
Integrating with CircleCI
Continuous Deployment services like CircleCI make it possible to run publish your project on Surge each time you push to a GitHub repository.
This guide will walk you through:
- Getting your Surge token, so CircleCI can login to Surge on your behalf
- Adding Surge as a
devDependency, so CircleCI can install Surge - Setting up your project on CircleCI, so you can publish each time you push to GitHub

Follow along
An open source companion to this guide is available on GitHub.Getting your Surge token
First, you’ll need your token from the Surge CLI. This secret key lets services like CircleCI login and publish projects on your behalf. Get your Surge token by running the following command in your terminal:
surge token
You’ll be asked to login again, and afterwards your token will be displayed like this:
token: a142e09a6b13a21be512b141241c7123
Adding Surge as a devDependency to a package.json file
CircleCI’s machines won’t have Surge installed by default, so you also need to save Surge as a development dependency in your project. This lets CircleCI know it needs to install Surge to publish your project.
You can do this by creating a package.json file if you don’t have one already. Run the following command in your terminal to be walked through making this file (you can hit enter to accept the defaults):
npm init
You will end up with a file that looks something like this one.
Next, run this command to save Surge as a devDependency, so CircleCI will install it:
npm install --save-dev surge
Double-check your tests
If you needed to add a new package.json file, you’ll want to make one small change. It’s possible your initial build will fail if you don’t have any tests, or if you have the default test command in your package.json.
You can add tests or just clear this out of your package.json file entirely, changing:
"scripts": {
  "test": "echo \"Error: no test specified.\" && exit 1"
}
…into:
"scripts": {
  "test": "echo \"Error: no test specified.\""
}
Commit this change, and push it to your repo. Now, even if you don’t have tests, CircleCI will be able to move onto the deployment command.
Add your project’s repository to CircleCI
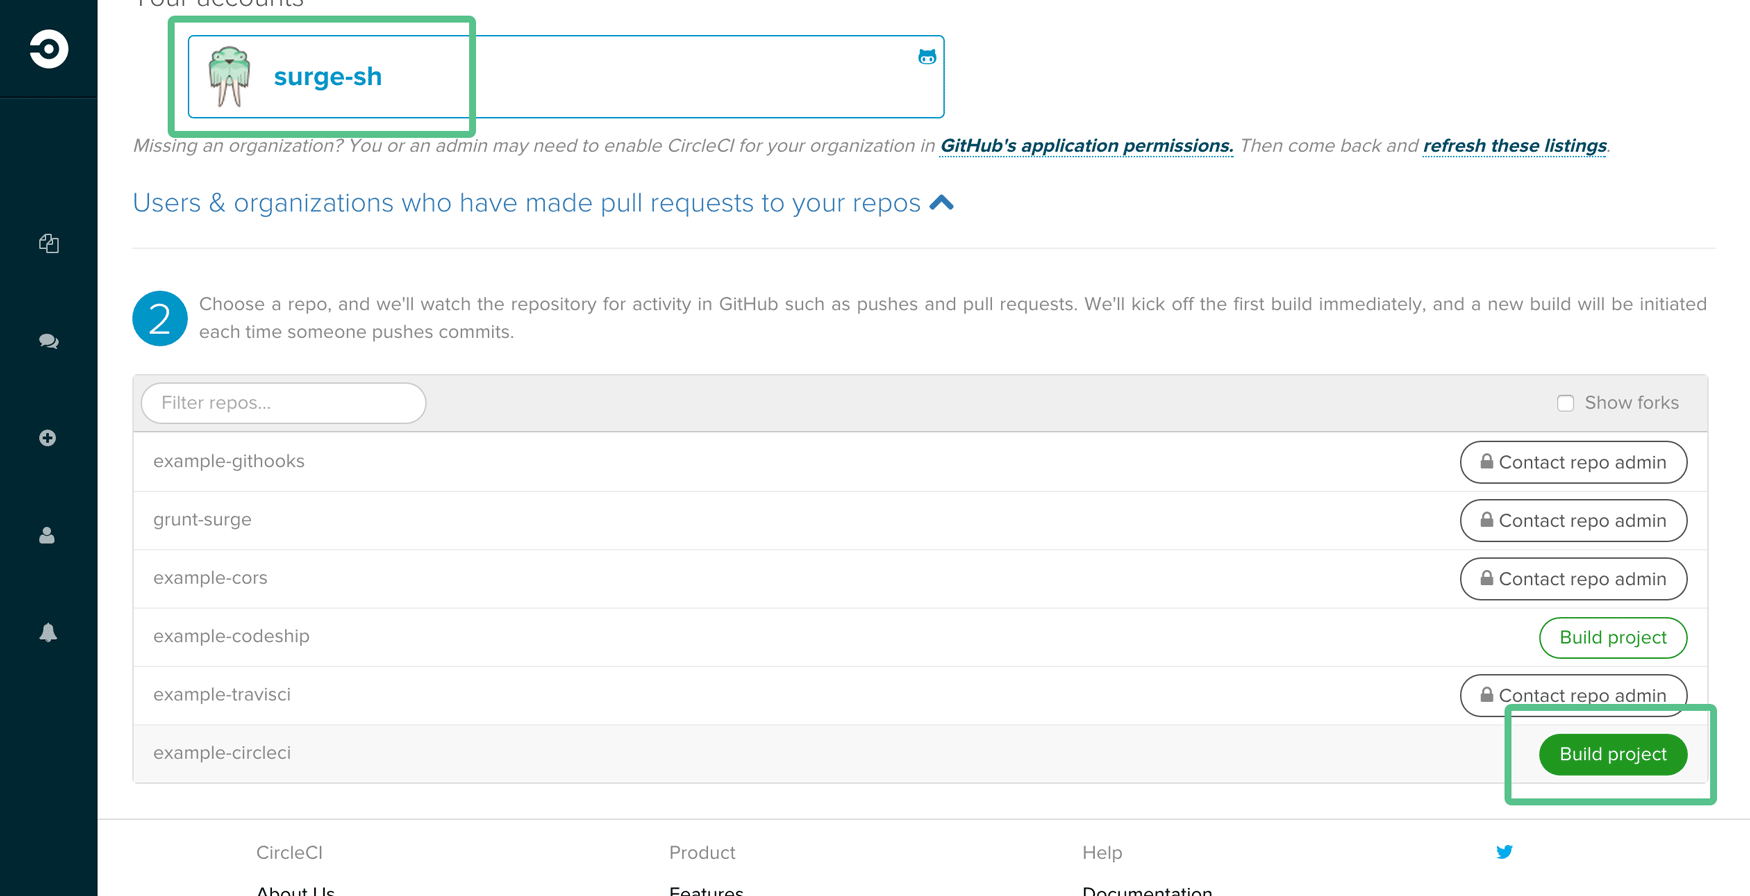
Now you can login and setup a new project on CircleCI. Choose the GitHub organisation your project is in (surge-sh in this example) and then build your project’s GitHub repository:
Add Environment Variables
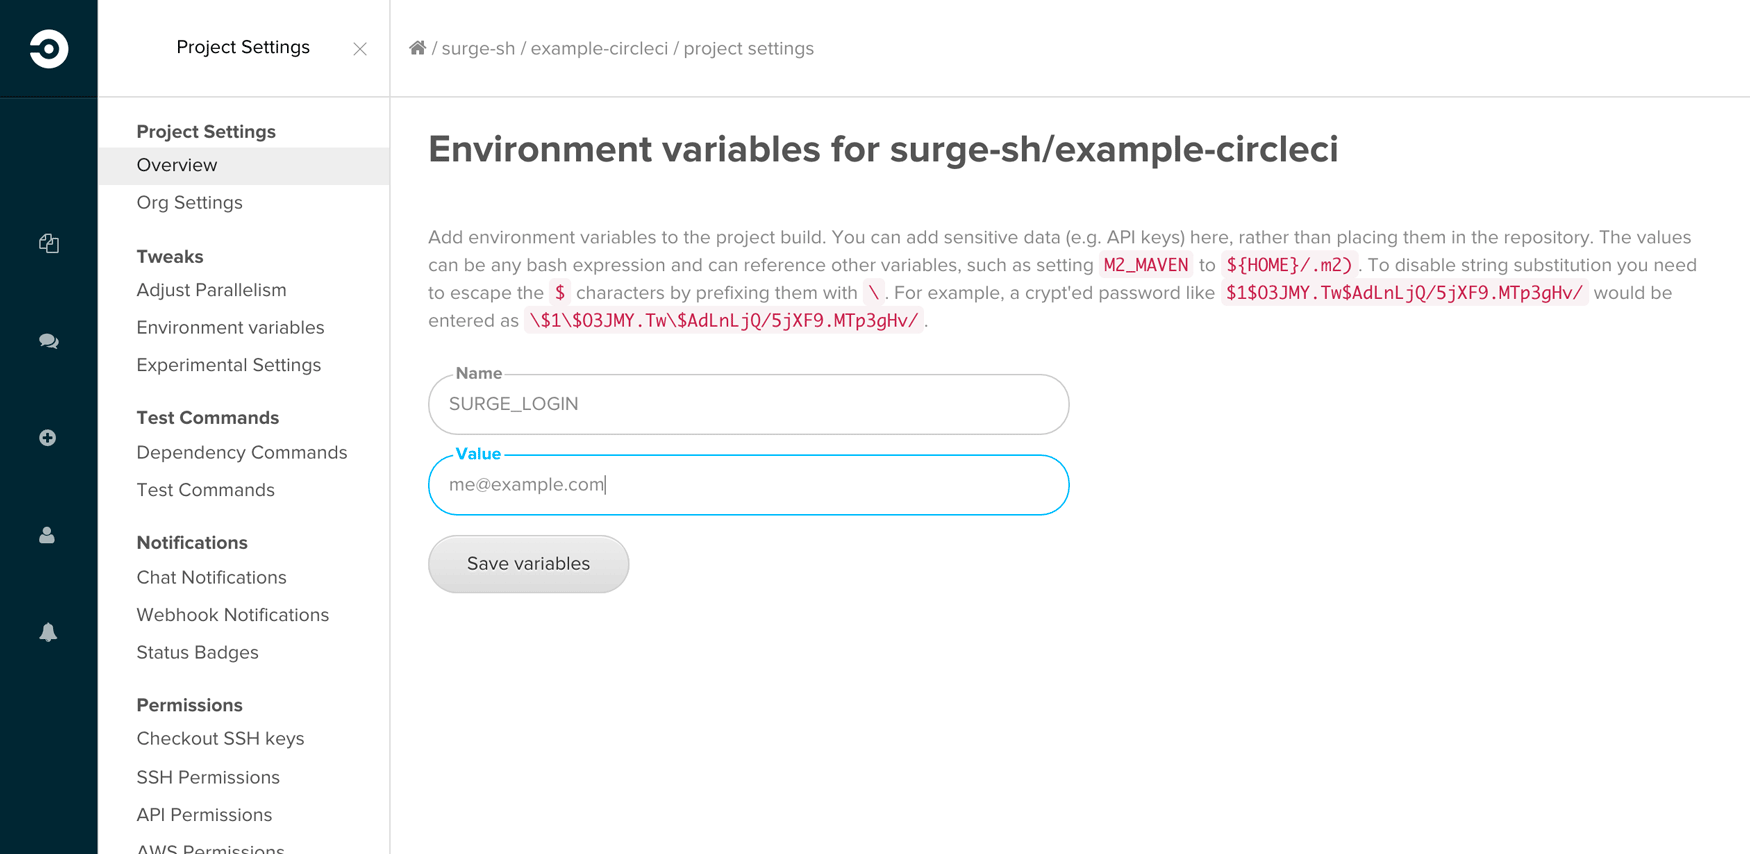
Choose Environment Variables from your project settings, and you’ll be able to secretly add your email address and token so CircleCI can login to Surge for you:
Create one environment variable called:
SURGE_LOGIN
…and set it to the email address you use with Surge.
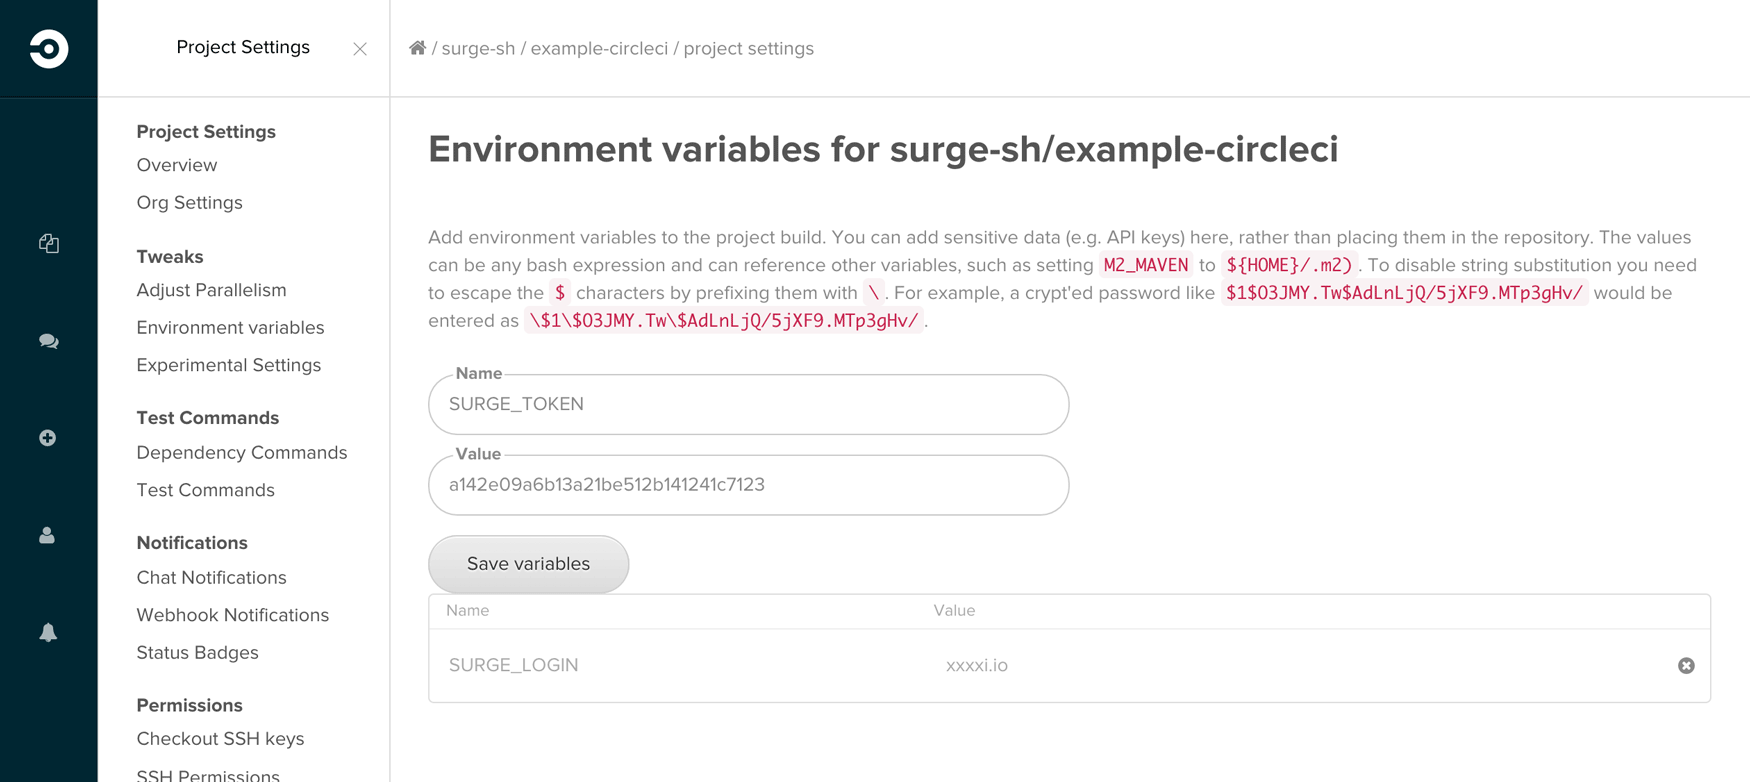
Next, add another environment variable called:
SURGE_TOKEN
…and set it to your Surge token.
Push a circle.yml file
The last step is to add a circle.yml file to your project.
…the
circle.ymlfile makes it easy to tell CircleCI what you need. This is a simple YAML file where you spell out any tweaks required for your web app. You place the file in your git repo's root directory and CircleCI reads the file each time it runs a build.
Your circle.yml file should look something like this:
deployment:
  production:
    branch: master
    commands:
      - surge --project ./path/to/your-project --domain your-project.surge.sh
After you push to your repository, CircleCI will run this surge command. Replace ./path/to/your-project with the path to the source files in your repository, and your-project.surge.sh with the domain you’d like to publish to.
There are more examples of what you can do with a circle.yml file directly from CircleCI.
Now, when you push your project to GitHub again, your deployment command will be run and your project will get published automatically.
